E-posta kullanıcılarını yönet
Thunderbird masaüstü uygulaması ile veya telefonlardaki K-9 E-posta uygulaması ile YunoHost üzerinde çalışan e-posta hizmetin üzerinden e-posta alıp gönderebilirsin.
Modern e-posta istemcileri kendileri otomatik bir şekilde özelleştirebilirler. Ama bu başarısız olursa, aşağıdaki adımları takip ederek el ile bunları düzeltebilirsiniz. (eğer bu başarısız olursa, bunun YunoHost kaynaklı bir hata olduğu anlaşılmalıdır ve biz hatayı tekrarlamak için bize vereceğiniz geri bildirimleri memnuniyetle okuruz!)
Generic settings
Here are the element you should enter to manually configure your mail client (domain.tld refers to what's after the @ in your email address, and username what's before @).
| Protocol | Port | Encryption | Authentication | Username |
|---|---|---|---|---|
| IMAP | 993 | SSL/TLS | Normal password | username (without the @domain.tld) |
| SMTP | 587 | STARTTLS | Normal password | username (without the @domain.tld) |
Client by client
- Mozilla Thunderbird
- K-9 Mail (Thunderbird Mobile)
- Dekko
 Configure Thunderbird Desktop (on a desktop computer)
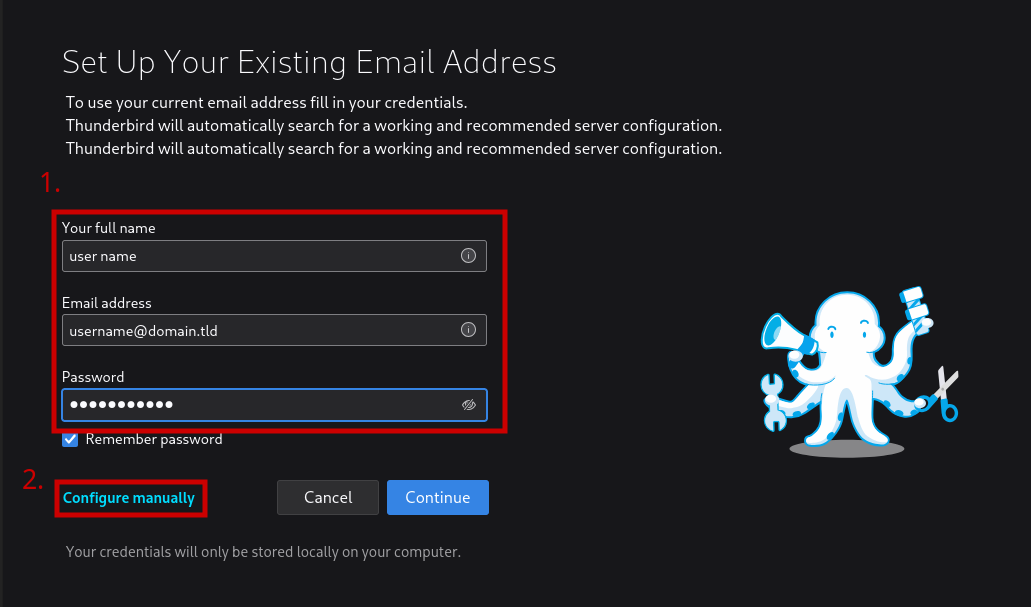
To manually configure a new account in Thunderbird Desktop, add the account information, then click on 'Configure manually'.
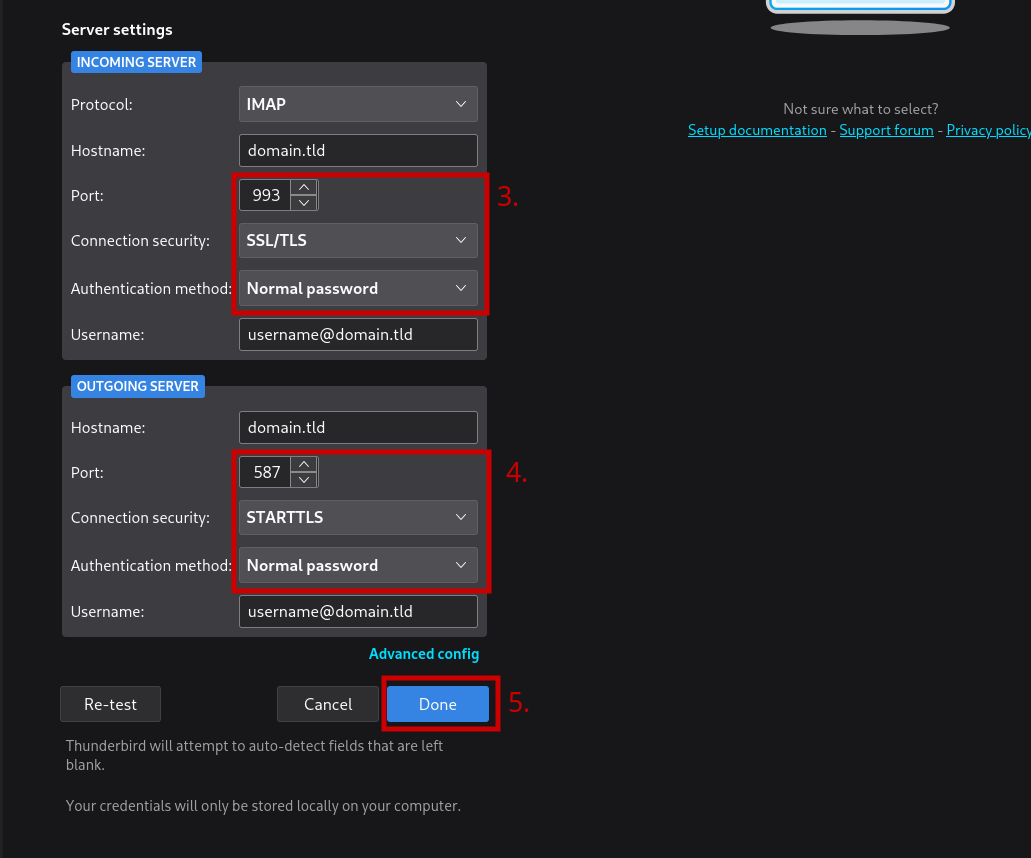
- For the incoming server, use IMAP with port 993 and SSL/TLS.
- For outgoing server, use port 587 with STARTTLS.
- Select 'Normal Password' for the the authentication method of both.
You may need to accept the certificate exceptions for fetching mails and after you send your first mail. Don't forget to remove the dot before the domain name.
 Configure K-9 Mail / Thunderbird Mobile (on Android)
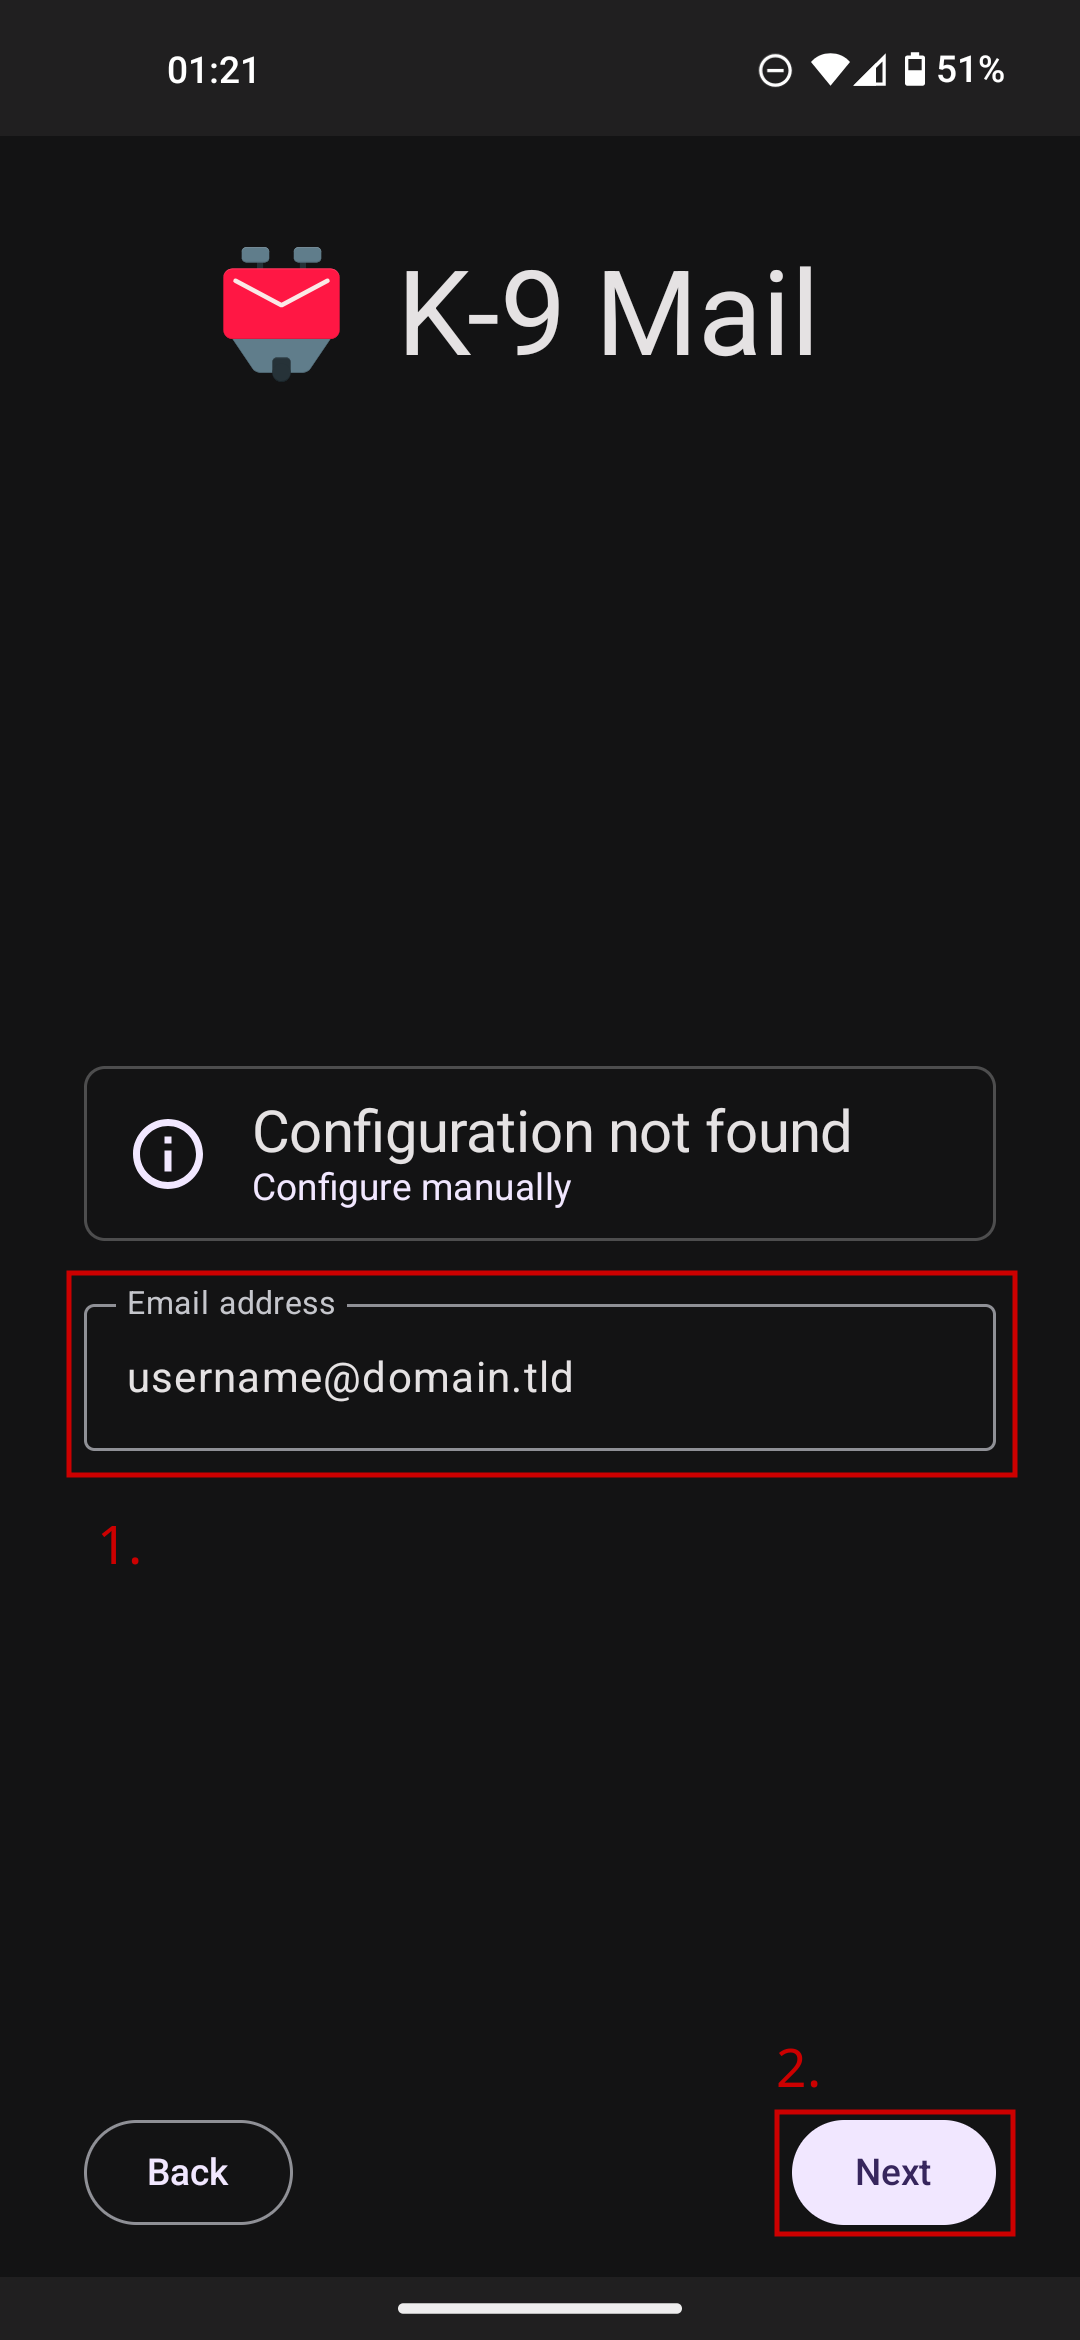
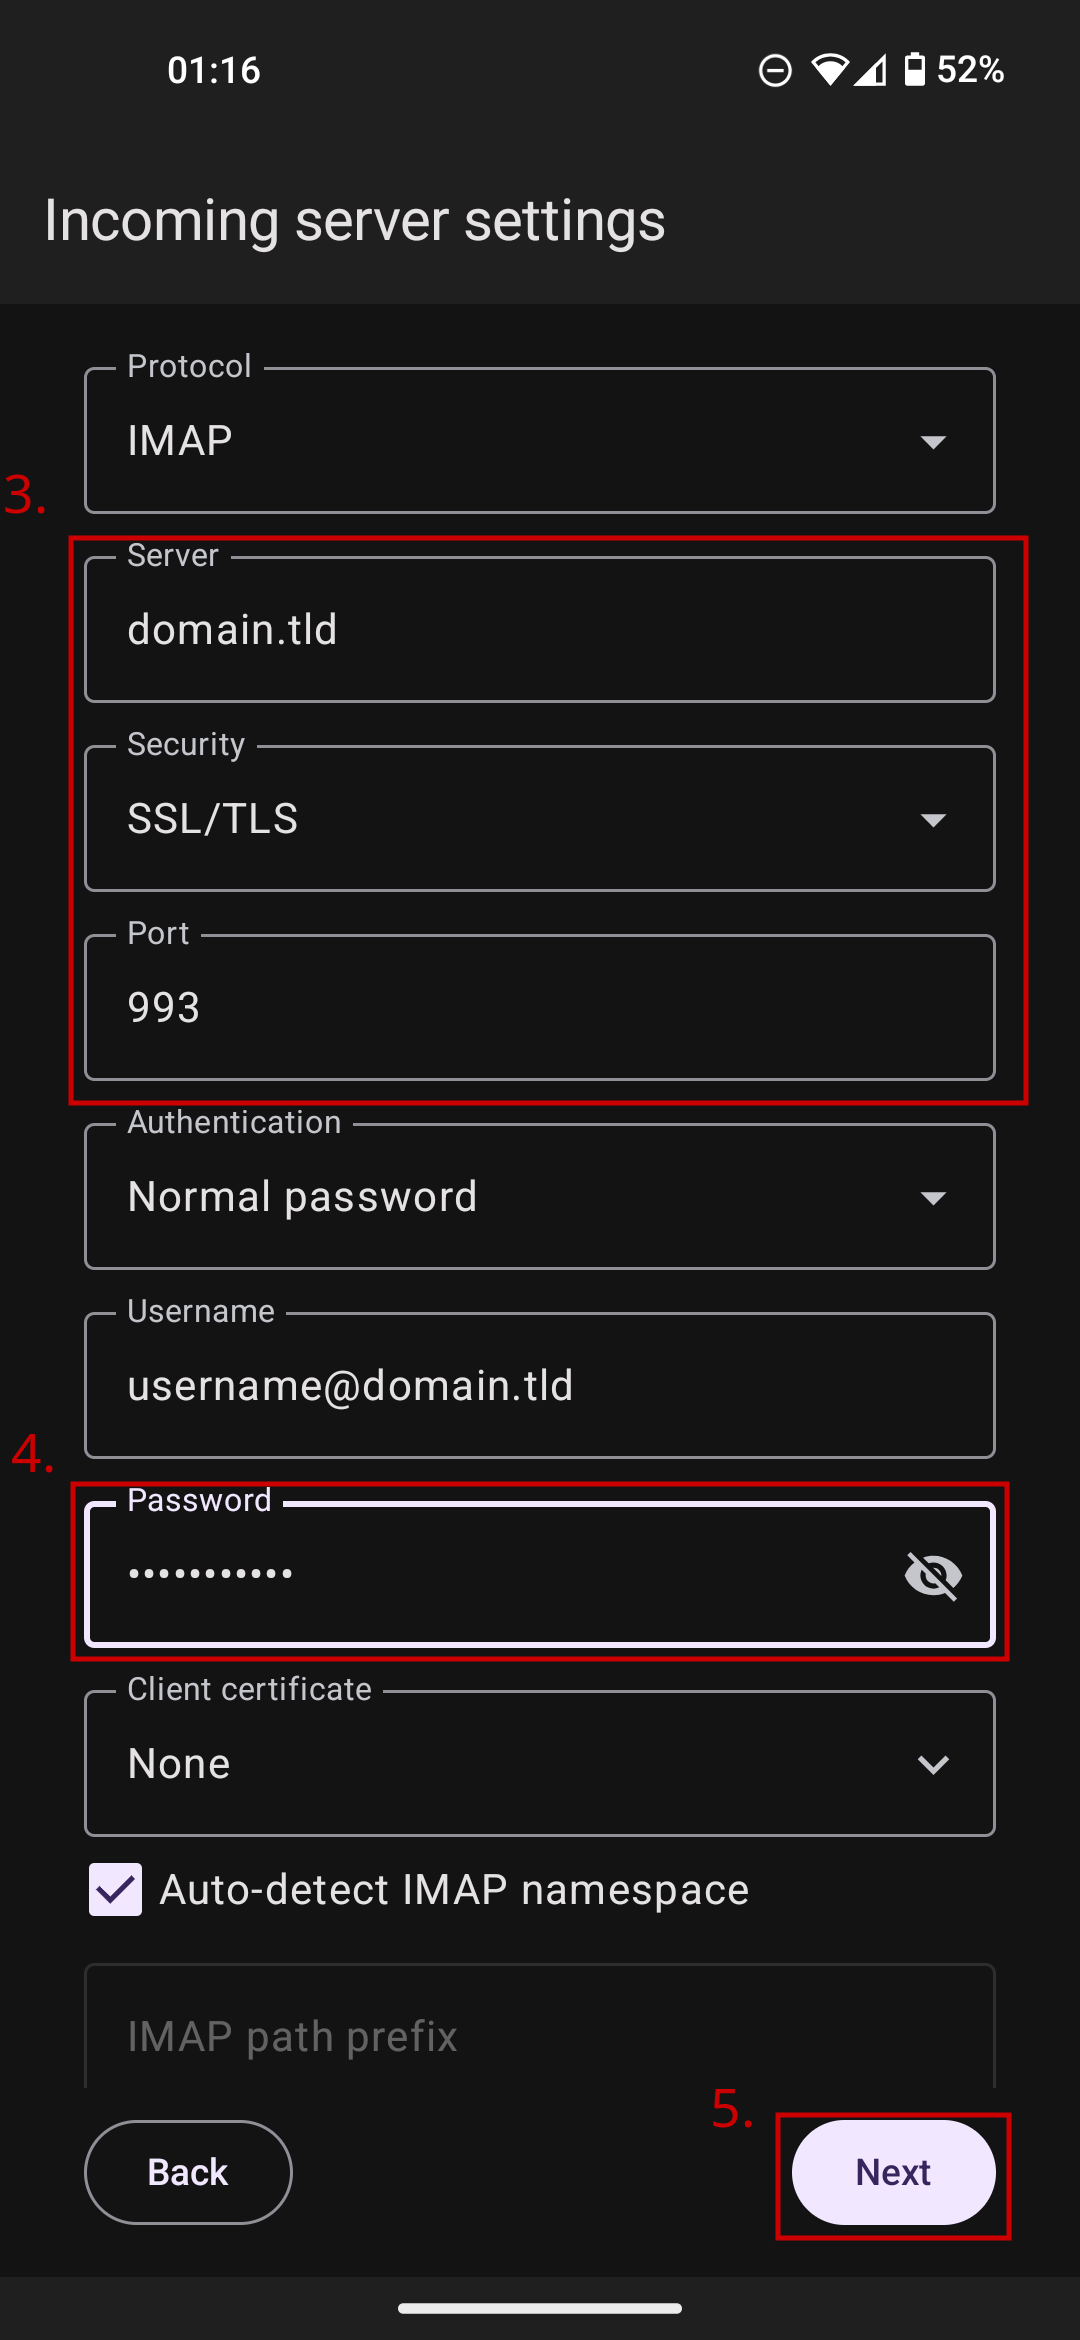
Follow the following steps. (As for Thunderbird Desktop, you might need to accept certificates at some points)
- Enter your email address then click "Next"
- Enter your domain name in the "Server" field, fill the "Security" and "Port" fields as per the IMAP row in the table above, then enter your password in the "Password" field and click "Next"
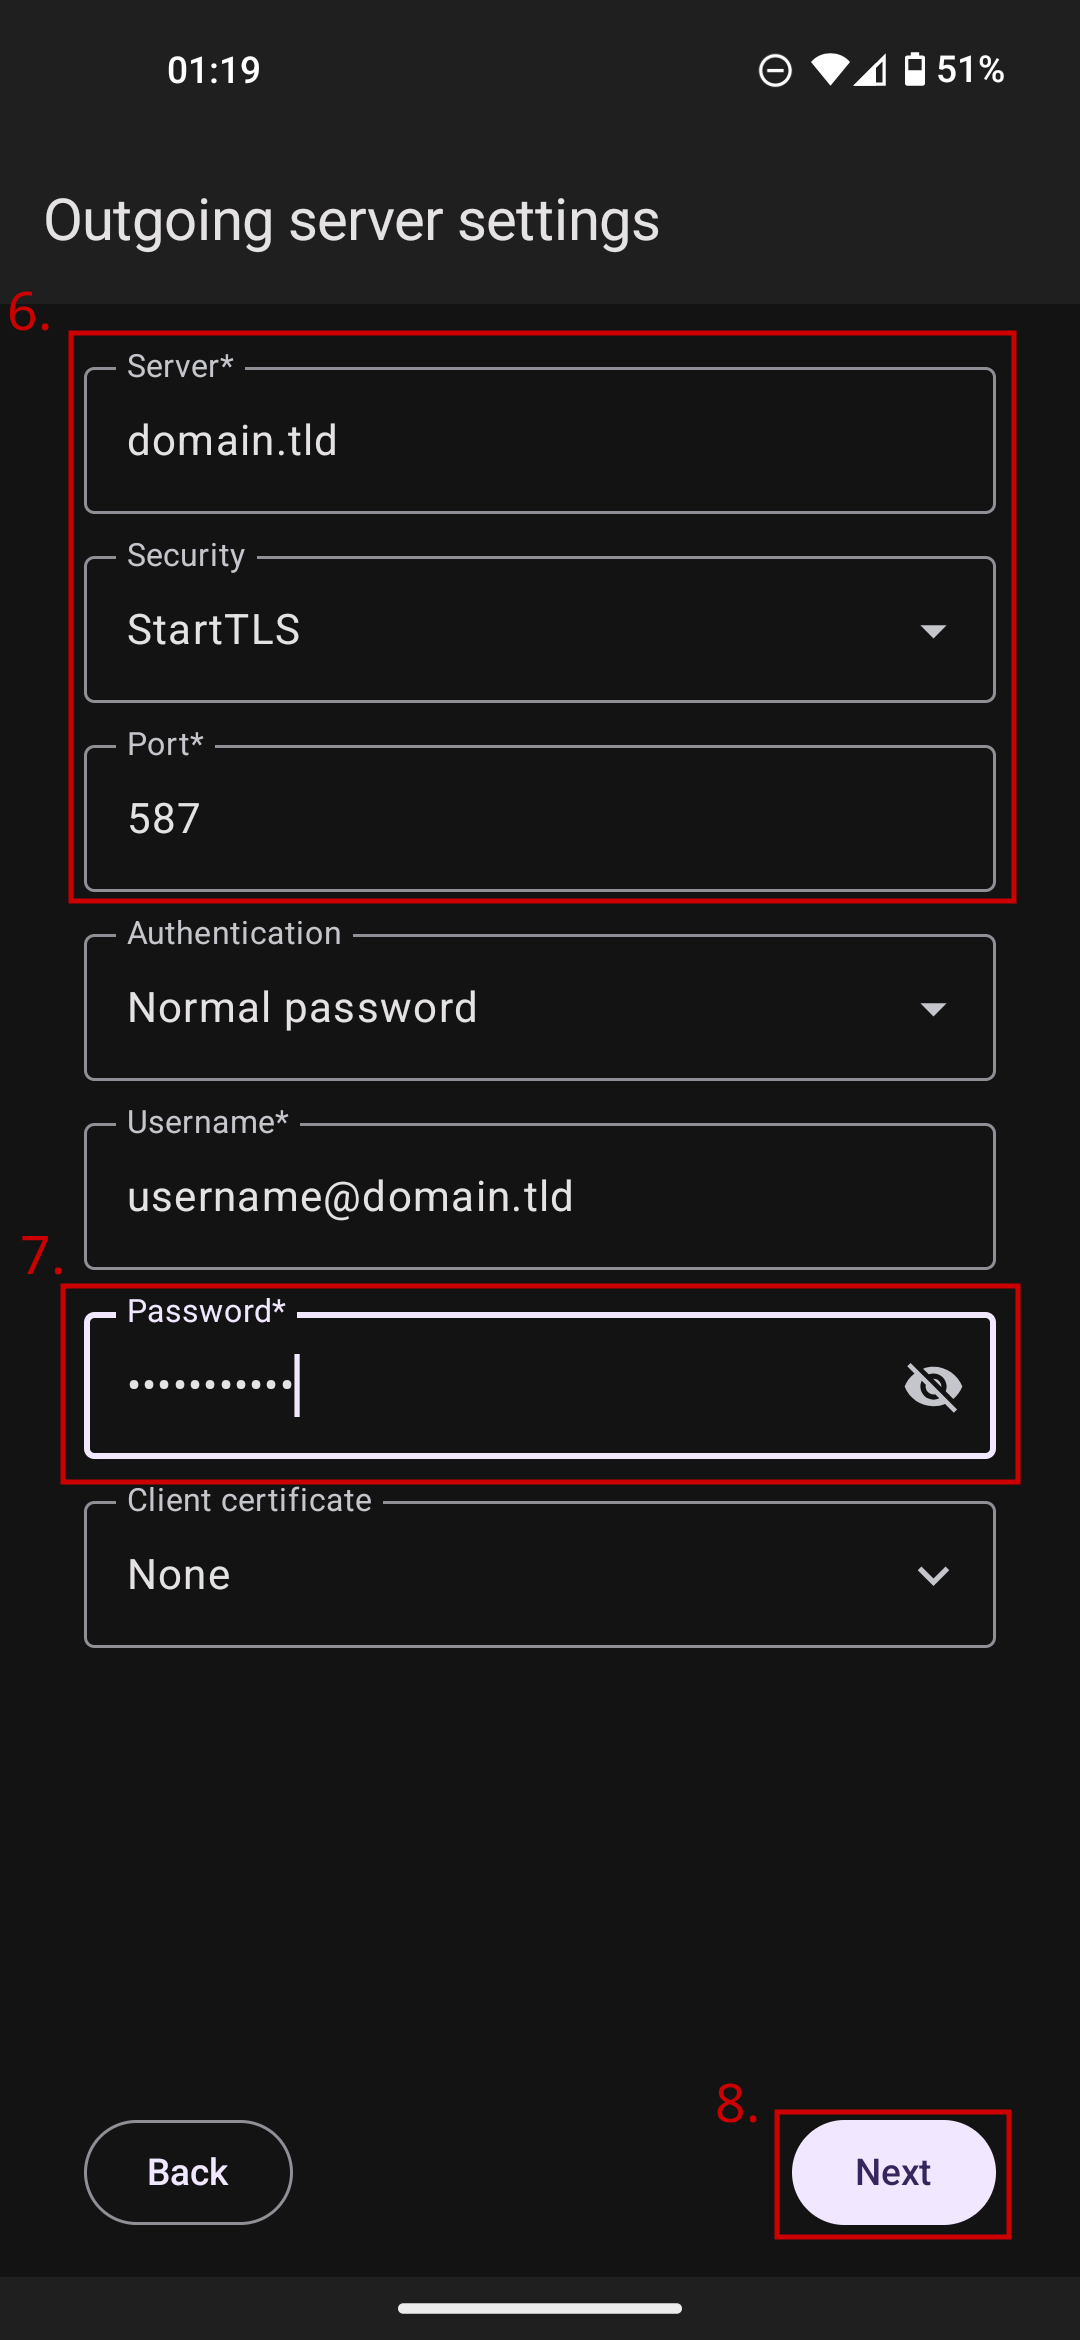
- Again, your domain name in the "Server" field, but fill the "Security" and "Port" fields as per the SMTP row in the table above, then enter your password in the "Password" field and click "Next"
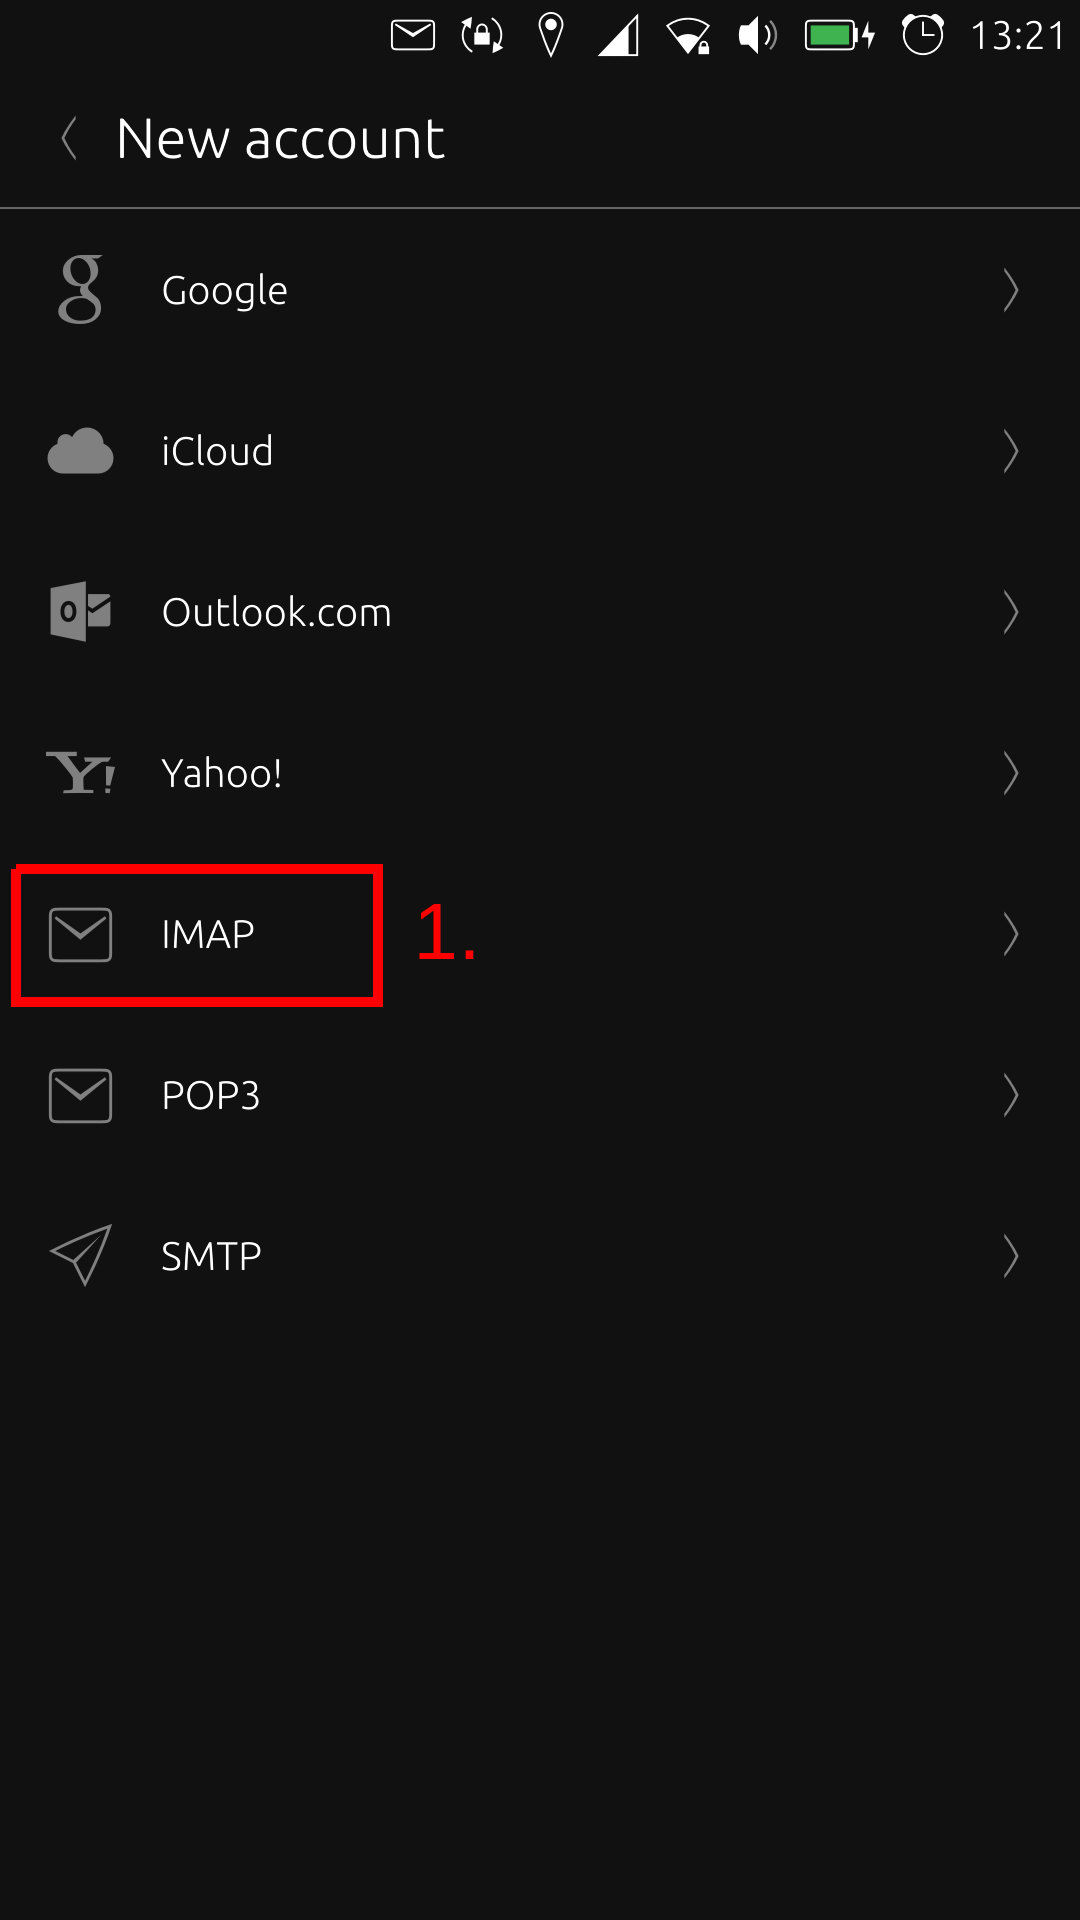
 Configure Dekko (on Ubuntu Touch)
The first time you can simply choose "Add account". If you already have an account configured, tap the hamburger menu then tap the gear, choose Mail, Accounts and press the '+'-symbol.
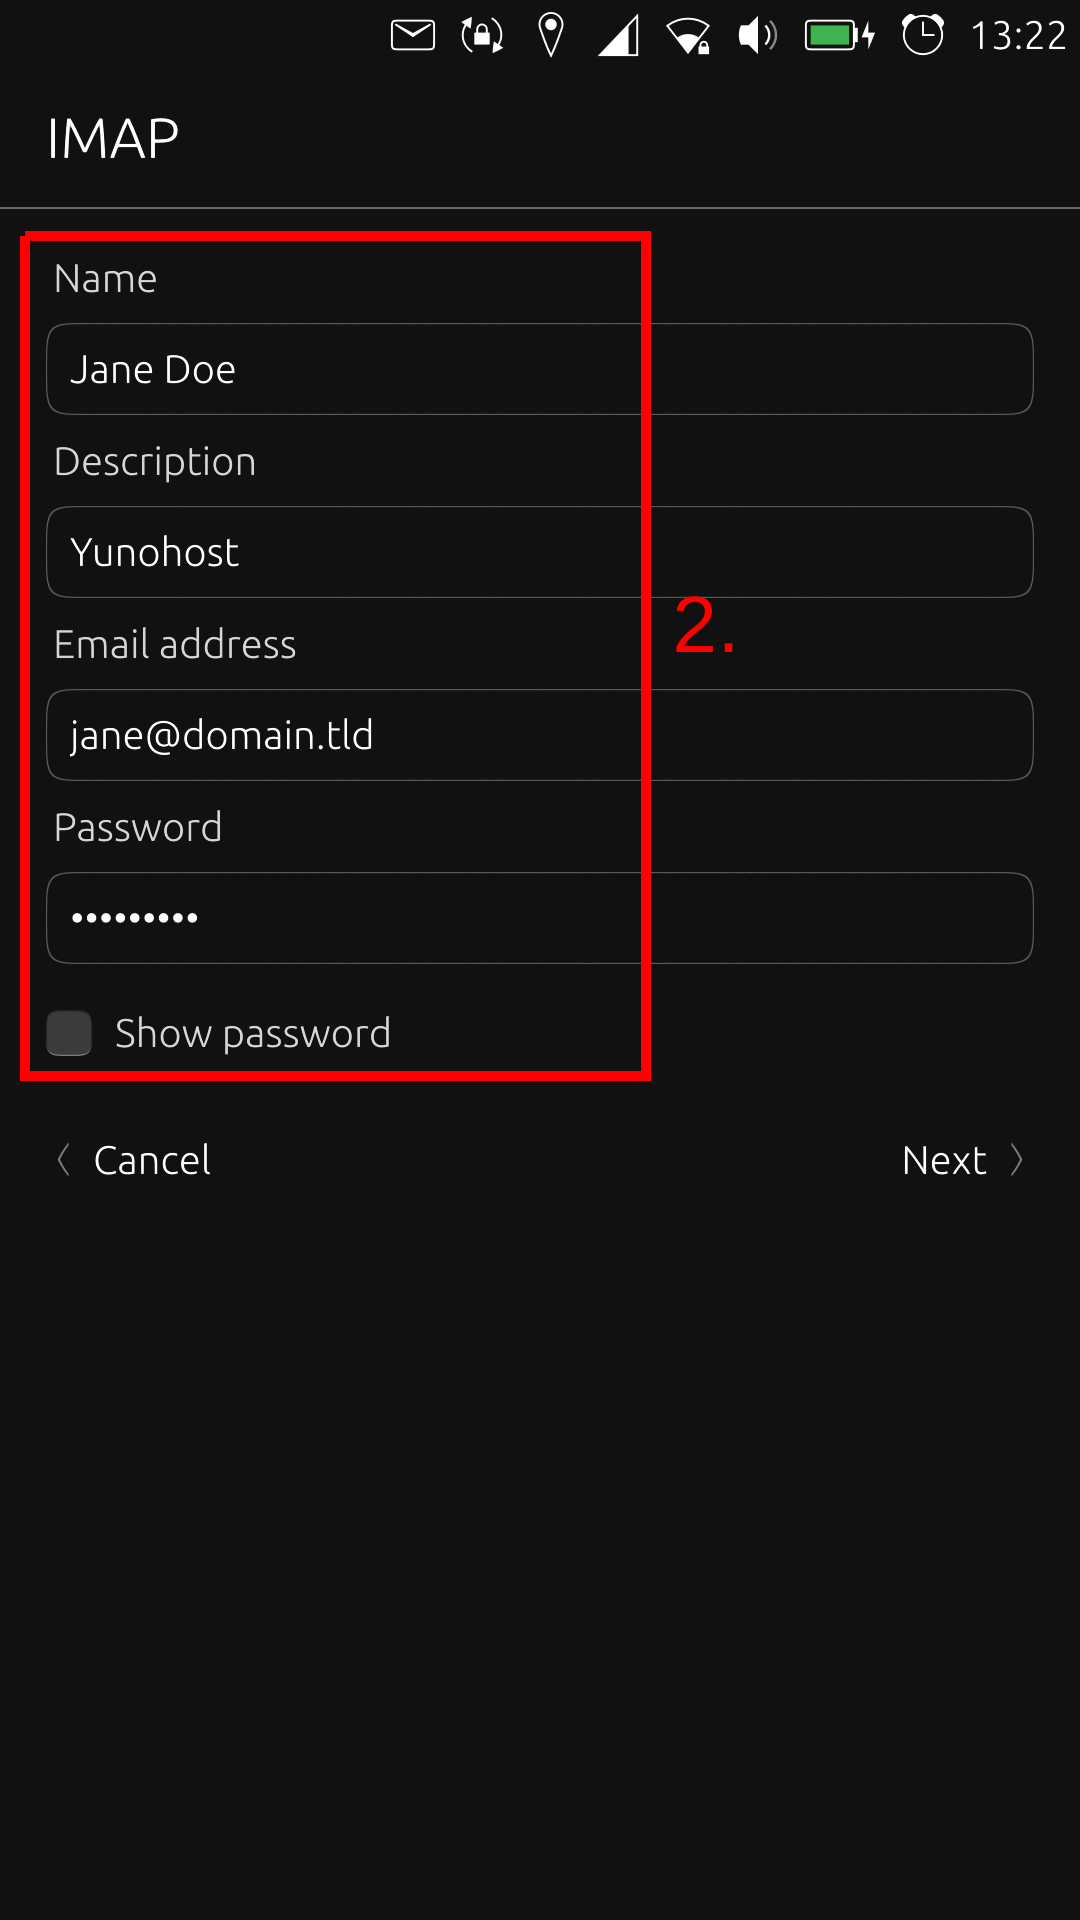
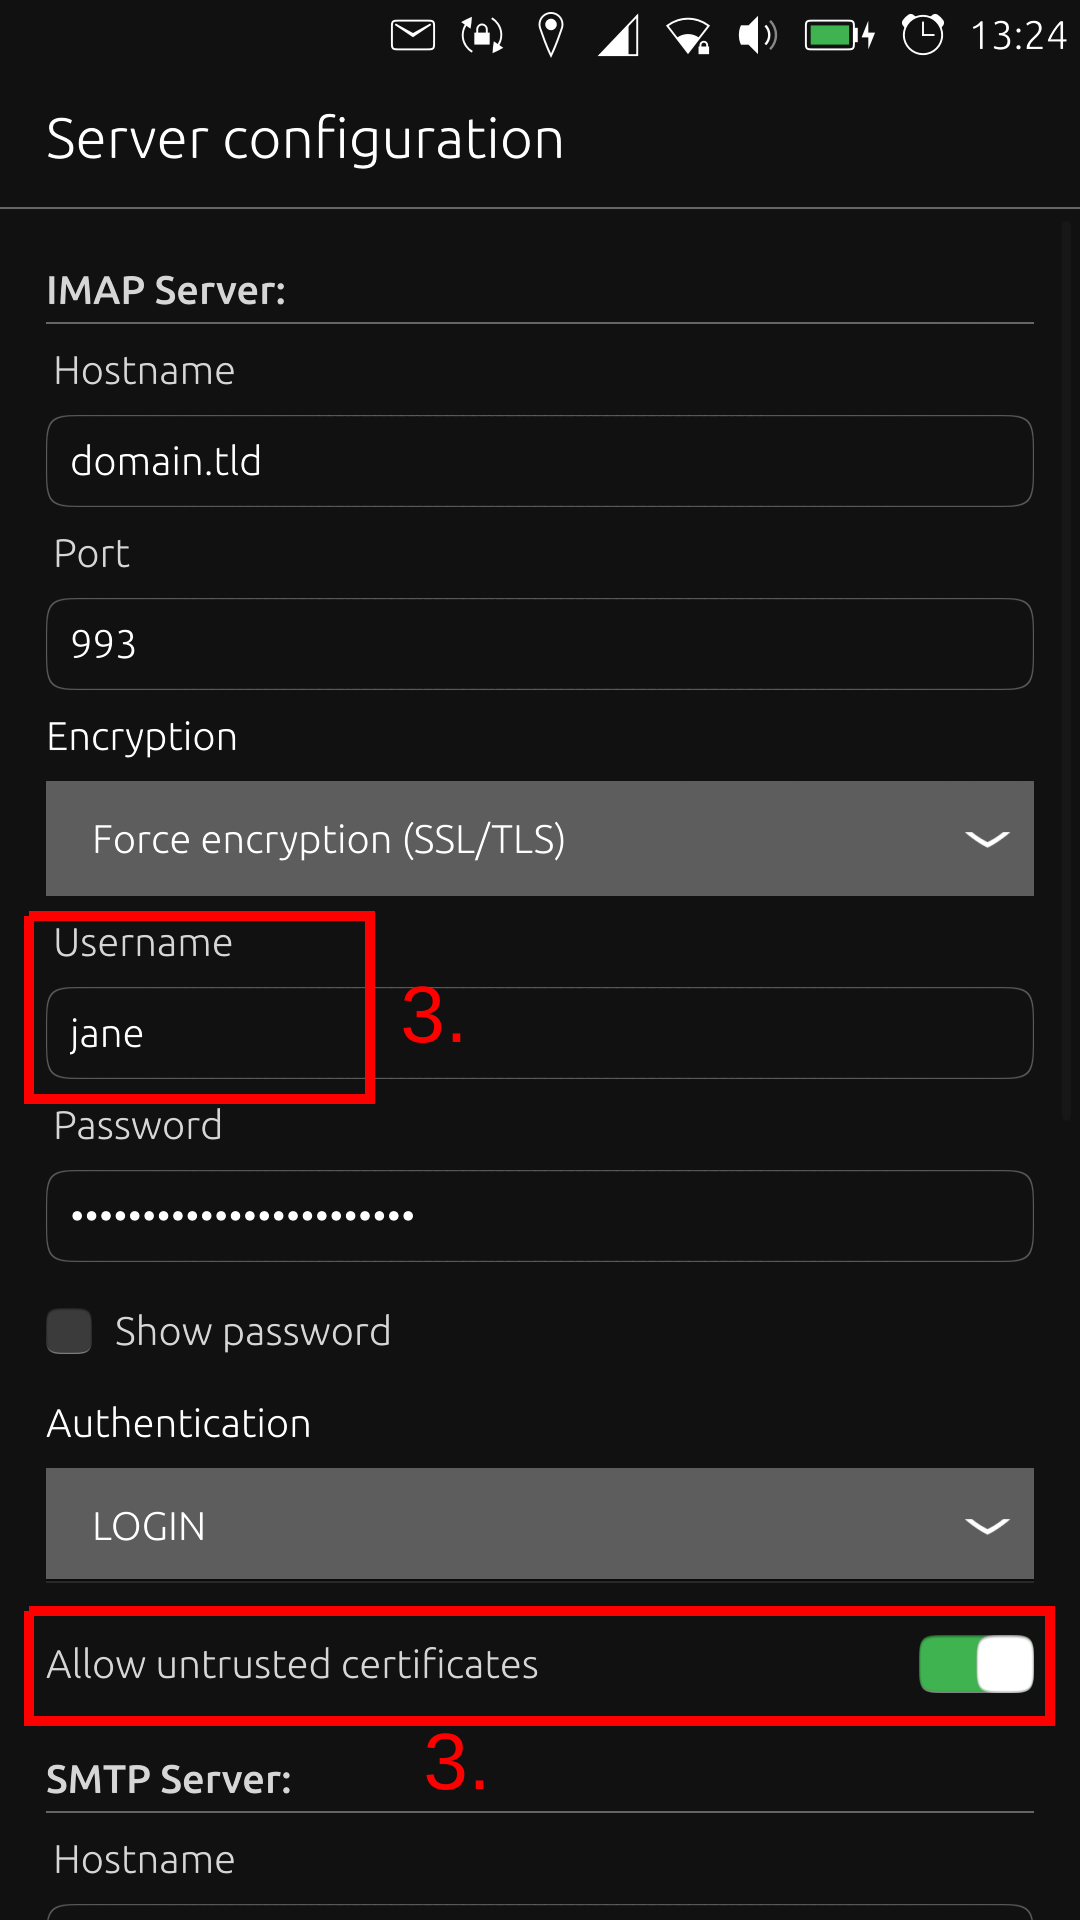
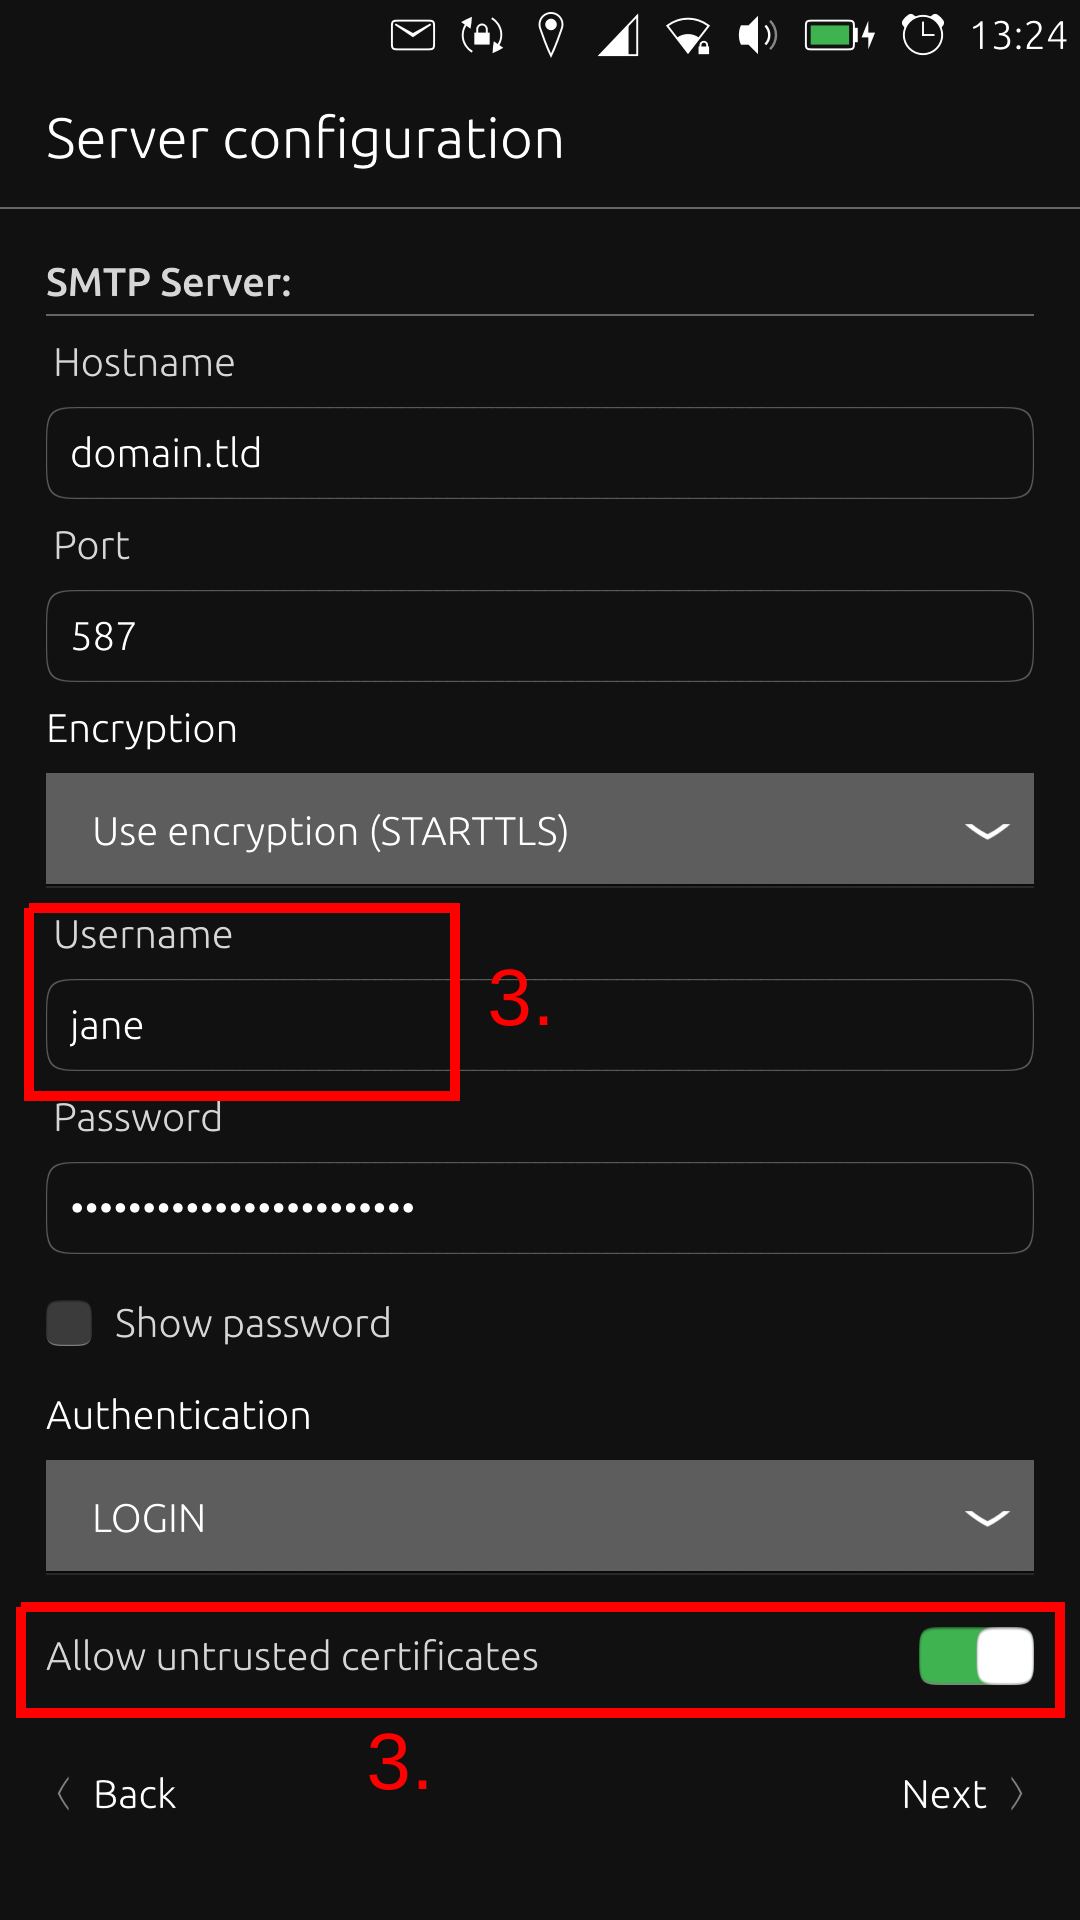
Then you choose IMAP. Fill in the fields and press Next. Now Dekko will look for the configuration. Check that all fields are correct. Make sure you have your YunoHost username, NOT your email address and choose "Allow untrusted certificates". Do this for IMAP and SMTP and press Next. Dekko will now synchronise the account after which you are done. Congratz!